Imagine walking into your backyard and seeing a planter box full of colorful flowers or fresh herbs. You made it yourself. This project is more than just wood and screws. It’s about making your space better and feeling good about your woodworking skills.
Whether you’re new to woodworking or looking for a fun project, this guide is for you. Adding a custom planter box is a great way to make your home look better.
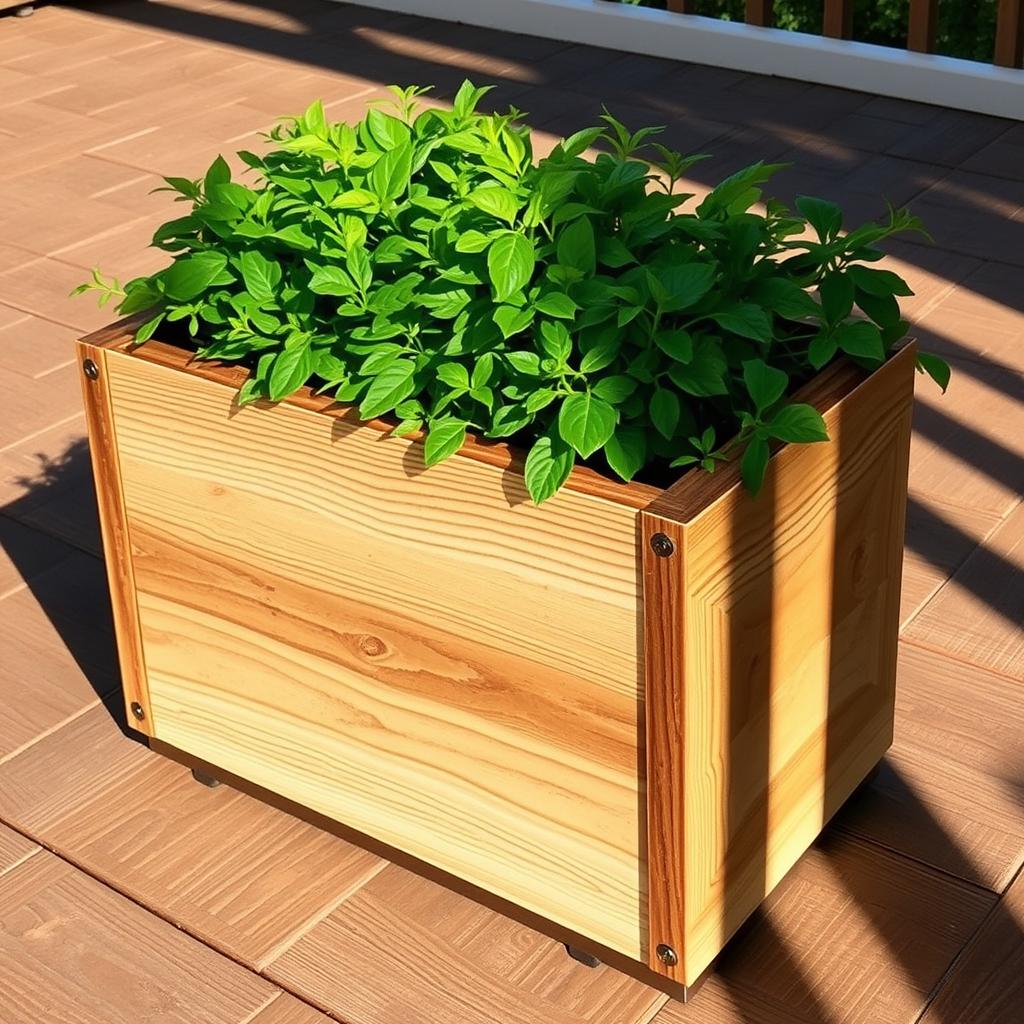
This guide will help you make a planter that looks good and works well. You don’t have to worry about making mistakes. Every step is easy to follow, so you can succeed.
By the end, you’ll have a beautiful planter that makes your outdoor space better. You’ll also feel proud of what you’ve accomplished.
Key Takeaways
- Perfect for beginners: Learn through clear, manageable steps.
- Customizable designs to match any garden or patio style.
- Woodworking basics that build confidence for future projects.
- Save money while adding long-lasting charm to your home décor.
- Eco-friendly materials and techniques for sustainable gardening.
Why Custom Wooden Planter Boxes Enhance Your Outdoor Space
Making your own wooden planter box makes your garden show off your creativity. Unlike store-bought ones, DIY projects let you pick every detail. You can choose the size, shape, and style to fit your space just right. Here’s why making your own has a bigger impact:
Benefits of DIY Wooden Planters Over Store-Bought Options
- Cost-effective: Use scrap wood or affordable lumber instead of high-priced store items.
- Custom fit: Build to fit small patios, decks, or corner spaces precisely.
- No assembly required: Avoid flimsy pre-made kits with tricky instructions.
Environmental Advantages of Wooden Planter Boxes
Wooden planters are better for the environment than plastic. Using reclaimed timber or FSC-certified wood helps reduce waste. Plus, untreated wood naturally breaks down over time. They’re also lightweight yet durable for years of use.
Customization Possibilities for Your Garden Aesthetic
Home décor crafts like wooden planters let you mix style with function. Try these ideas:
| Style | Design Tips |
|---|---|
| Rustic | Exposed wood grain, natural stains |
| Modern | Sharp angles, sleek finishes |
| Eclectic | Mixed materials, painted accents |
“A well-designed planter is more than a container—it’s a statement piece that evolves with your garden.”
By making your own, you control every detail. From drainage holes to decorative carvings, your outdoor space becomes a canvas. It shows off your plants and personal style.
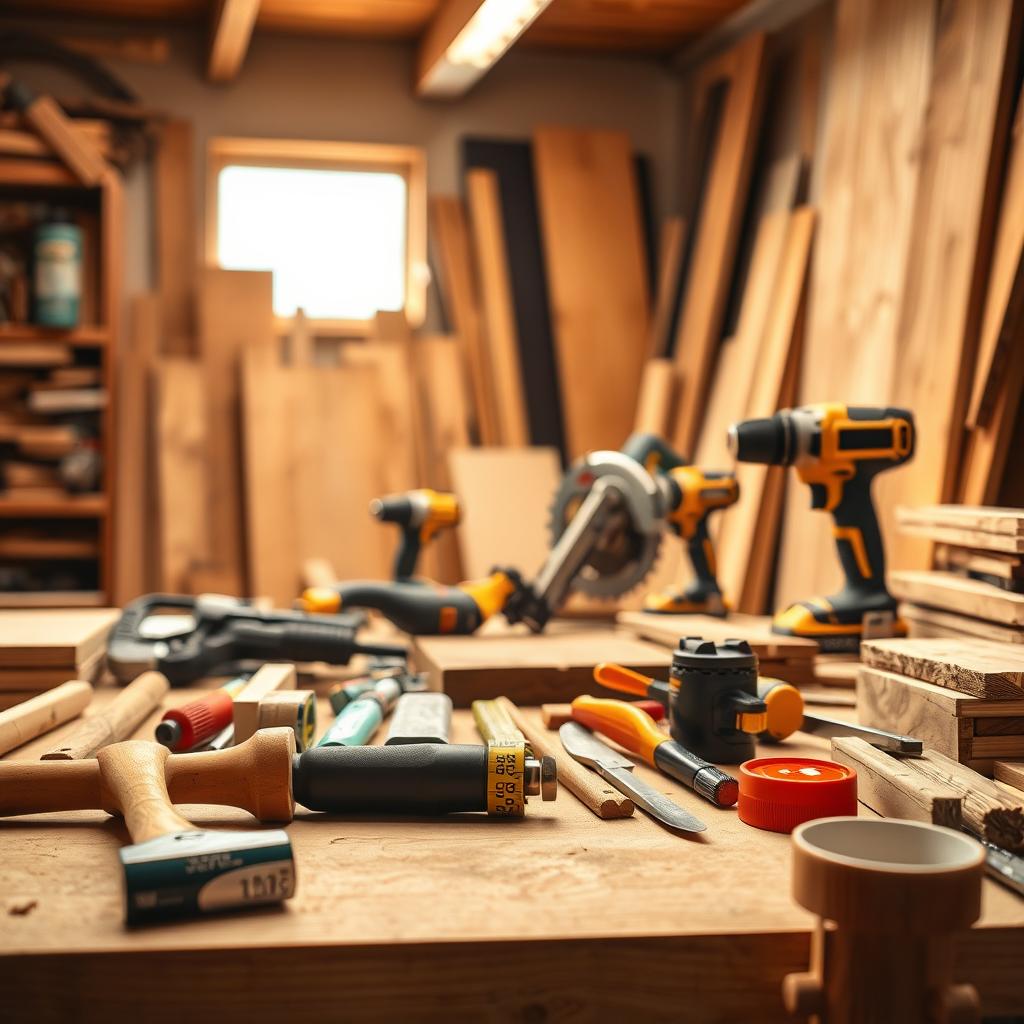
Essential Tools and Materials for Your Wooden Planter Project
Starting your woodworking project needs the right tools and materials. Let’s go over what you need before you start cutting. Everything is explained for DIY beginners, so you won’t have to guess!
- Measuring tape (metal for durability)
- Drill with bits for pilot holes
- Crosscut or handsaw (see table below for options)
- Hammer and utility knife
- Safety goggles and work gloves
| Saw Type | Best Use | Beginner-Friendly? |
|---|---|---|
| Hand Saw | Cutting straight lines on thinner wood | Yes |
| Circular Saw | Ripping thick lumber | Requires skill |
Materials Checklist:
- Lumber: 1×6 or 1×8 cedar/cedar planks (see Section 4 for wood types)
- Outdoor-grade wood screws (galvanized or stainless steel)
- Wood glue for tight joints
- 120/220/320 grit sandpaper
Need a budget boost? Borrow power tools from local libraries or rent from Home Depot. Use landscape fabric instead of expensive liners. Always look for sales at hardware stores. Safety is key: wear goggles and gloves. With this list, even beginners can confidently start their project.
Selecting the Right Wood for Durability and Aesthetics
Finding the perfect wood is key for a stylish and strong planter box. The right wood keeps your plants safe and adds beauty to your woodworking projects for home décor. Think about what matters most to you first.
Weather-Resistant Wood Options for Outdoor Planters
Naturally durable woods fight off rot and pests:
- Cedar: Oils keep insects away, easy to care for
- Redwood: Light, turns silver-gray over time
- Teak: Luxurious, needs little sealing
Budget-Friendly Alternatives That Still Look Great
Pressure-treated pine is a cost-effective choice. Look for woodworking projects for home décor guides to find safe, non-toxic options. Make sure to check for any knots or warping before you buy.
Understanding Wood Treatments for Longevity
Keep your planter lasting longer with these treatments:
- Seal with exterior-grade polyurethane (e.g., Minwax)
- Apply linseed oil for a natural look
- Use marine-grade stains to keep moisture out
Sustainable Wood Choices for Eco-Conscious Gardeners
| Option | Pros | Cons |
|---|---|---|
| Reclaimed Wood | Unique look, eco-friendly | May need extra sanding |
| FSC-Certified Pine | Sustainably sourced | Less weather-resistant |
| Bamboo | Rapidly renewable, durable | Higher cost |
Always check the wood for straight grains and no cracks. Choose pre-treated planks marked “outdoor use” at home improvement stores.
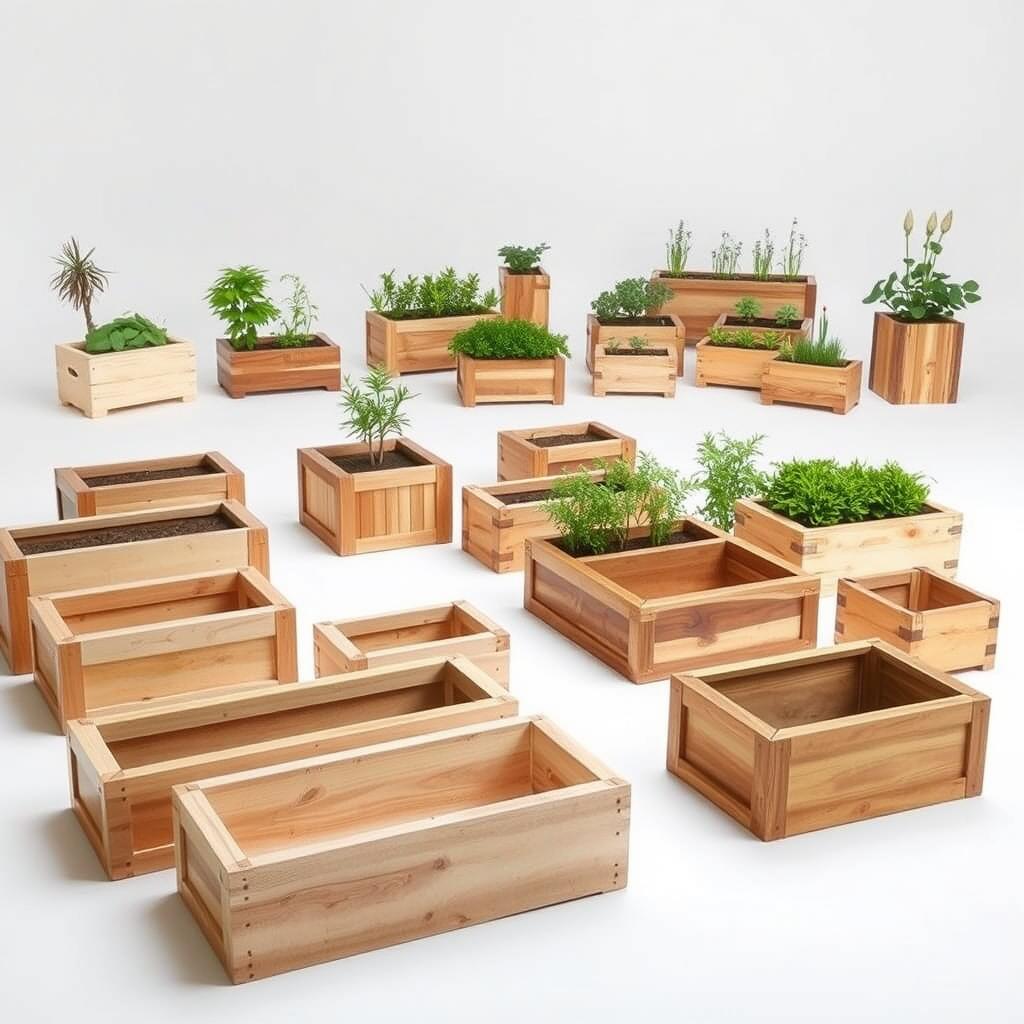
Designing Your Custom Wooden Planter Box: Measurements and Plans
Start by sketching or using a grid template to plan your planter’s shape and size. Beginner woodworking tips remind us to measure the space first. Use a tape measure to make sure your planter fits perfectly.
Always add 2-3 inches to your measurements. This is for the wood thickness and the saw blade width.
| Planter Type | Dimensions (LxWxH) | Soil Depth | Plant Examples |
|---|---|---|---|
| Small | 18″ x 12″ x 10″ | 6-8″ | Herbs, succulents |
| Medium | 24″ x 18″ x 12″ | 8-10″ | Annual flowers, small vegetables |
| Large | 36″ x 24″ x 14″ | 10-12″ | Tomatoes, shrubs, perennials |
- Sketch your design on graph paper or use a free template from DIY websites like Wood Magazine.
- Leave 2-3 inches of extra length when cutting to adjust for mistakes.
- Mark drainage hole locations before cutting to avoid waterlogging plants.
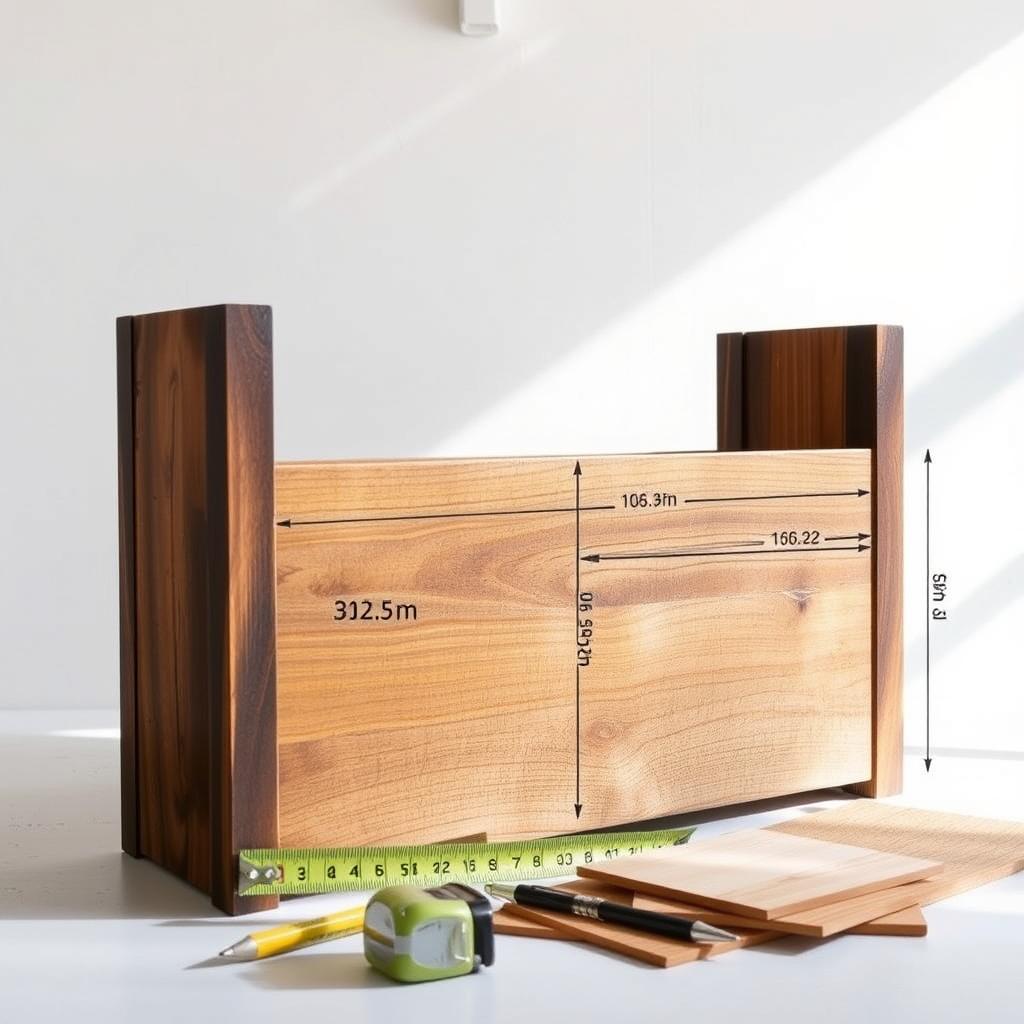
Download a free grid template at example.com/planters-template to scale your design. Adjust dimensions for taller plants by increasing height, but never skimp on soil depth—roots need space to grow. Remember, precise measurements save time and materials. Your sketch is your roadmap to a functional, beautiful planter!
How to Build a Custom Wooden Planter Box: A Step-by-Step Guide
Ready to start building? Let’s walk through each step with these simple woodworking ideas tailored for beginners. Gather your tools and follow along to create a sturdy, functional planter box.
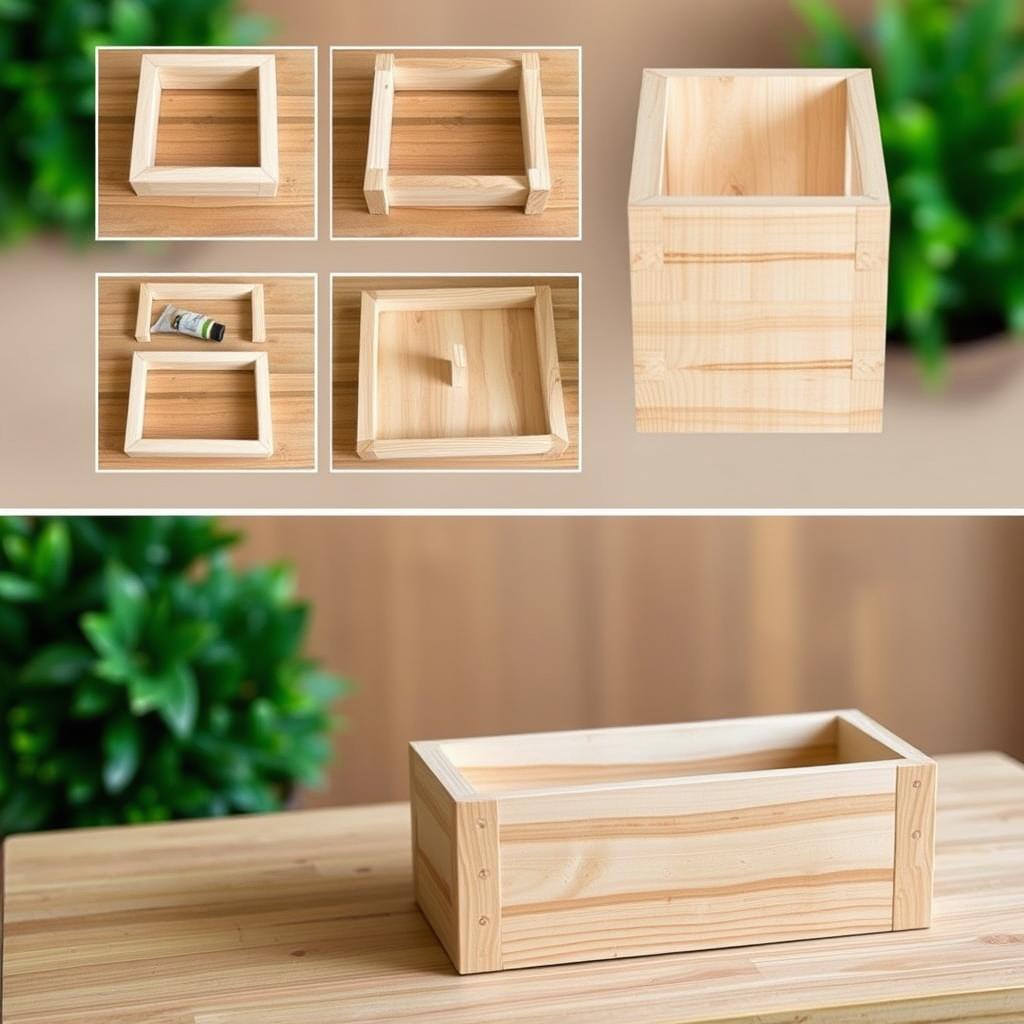
Cutting Your Wood to the Right Dimensions
Measure twice, cut once! Use a tape measure and pencil to mark all board lengths. For straight cuts, clamp a straightedge guide to your saw or use a miter saw for precision. Safety first: wear eye protection and secure wood firmly.
“Aim for ½-inch overcuts—sand down later to avoid errors.”
Assembling the Base Structure
Begin by laying out the base planks on a flat surface. Align corners using a carpenter’s square. Pre-drill pilot holes to prevent splitting, then secure with screws. Test for square by measuring diagonals—equal lengths confirm perfect corners.
Creating Proper Drainage Systems
- Drill 3–4 evenly spaced ½-inch drainage holes in the base.
- Add a 1-inch gravel layer to improve water flow.
- Use a mesh screen over drainage holes to block soil leakage.
Securing the Sides and Corners
| Material | Pros | Cons |
|---|---|---|
| Wood screws | Strong grip, no visible heads | Require pre-drilling |
| Pocket hole screws | Quick assembly, hidden joints | Needs special jig |
Reinforce corners with corner braces for larger planters. Align edges precisely before tightening fasteners fully.
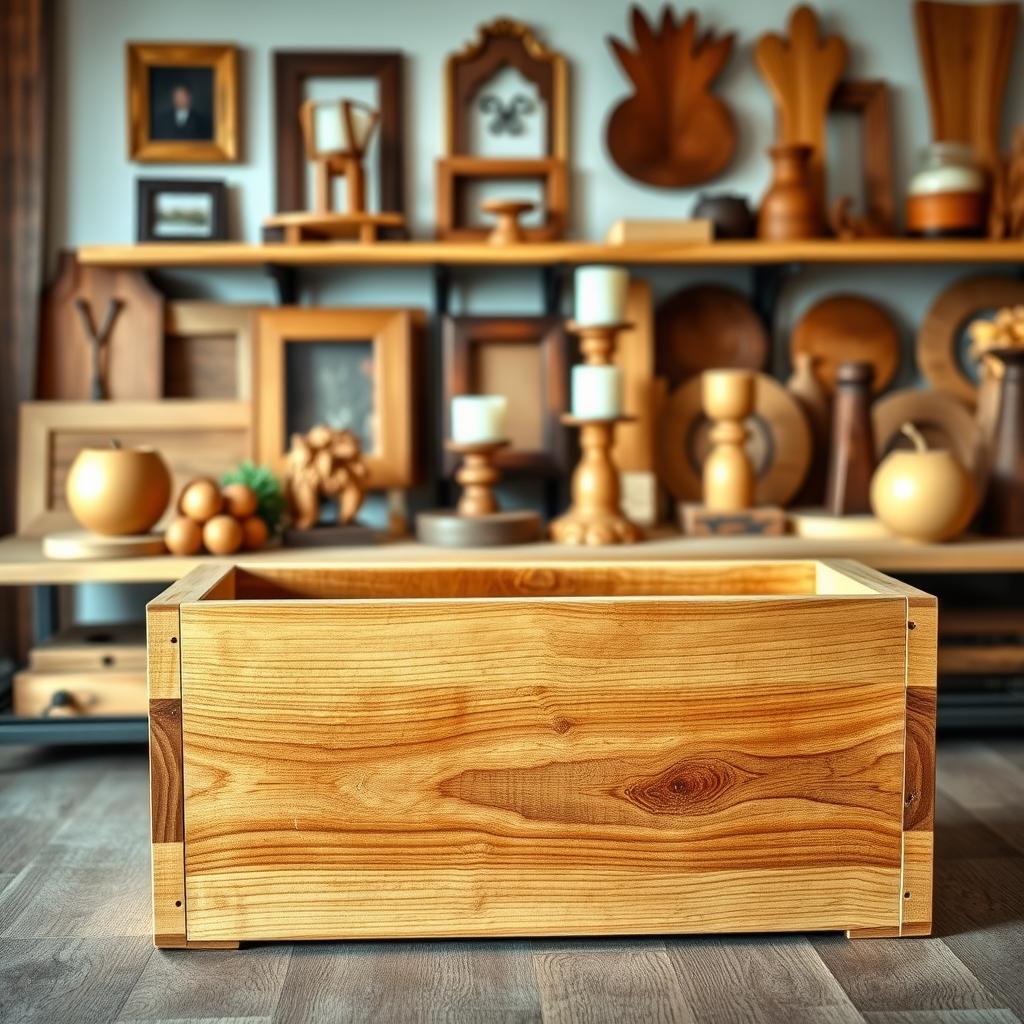
Adding Finishing Touches for Protection and Style
Finishing touches make your planter stand out. Even simple projects can look great with the right steps. Let’s explore how to add both function and style.
Sanding Techniques for a Professional Finish
Begin by sanding all surfaces with 80-, 120-, and 220-grit sandpaper. The coarser grits get rid of rough spots. The finer grits make the surface smooth.
Pay extra attention to edges where splinters can form. Use a detail sanding block for corners.
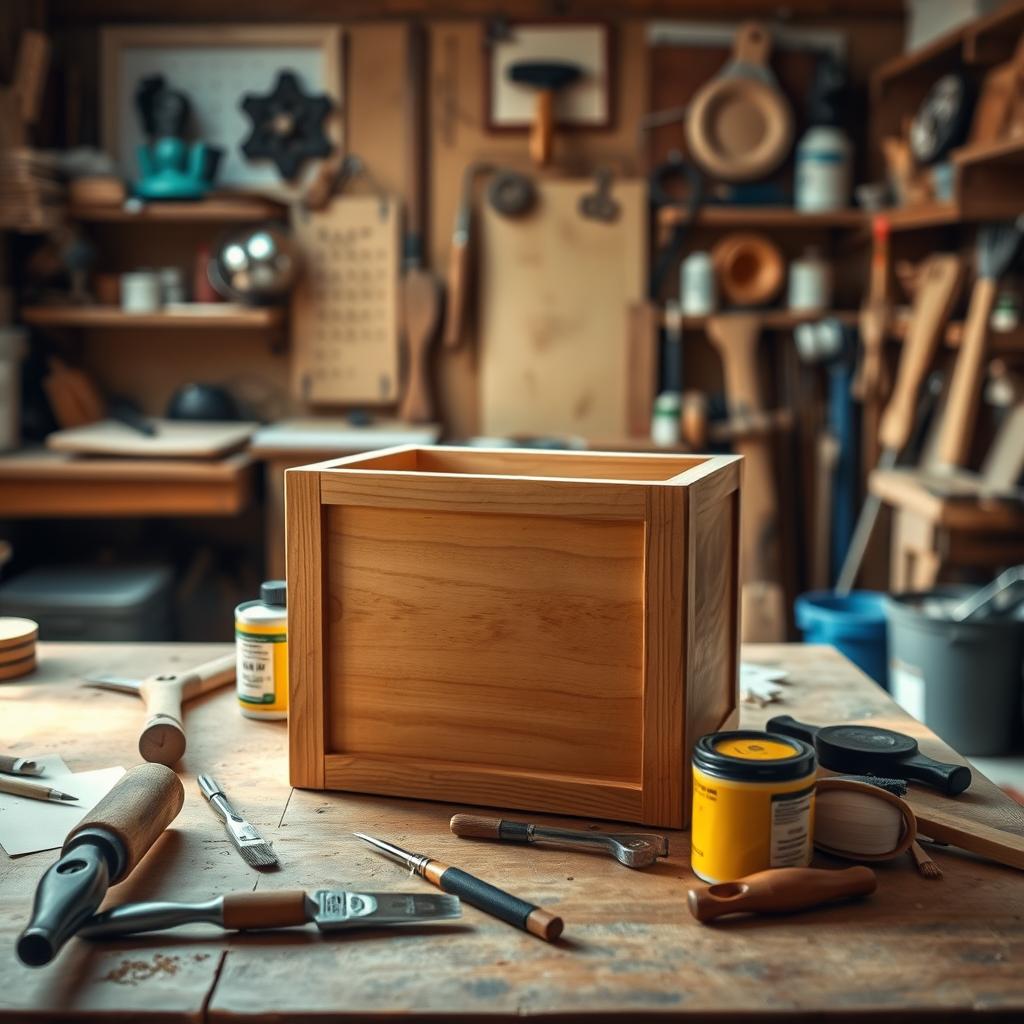
Applying Sealants and Waterproofing
Choose the right sealant for your wood. Here are some good options:
| Product | Type | Best For |
|---|---|---|
| Minwax Penetrating Sealant | Oil-based | Enhancing natural wood grain |
| Thompson’s WaterSeal | Water-based | Quick-drying outdoor protection |
Apply the sealant with a brush in thin, even layers. Make sure each layer dries before adding the next. This protects against rot and UV damage.
Decorative Elements to Consider
- Add routed edges for sleek lines
- Paint edges with acrylic paint for color pops
- Attach metal corner brackets for industrial flair
- Stencil patterns using vinyl decals
Use painter’s tape for sharp lines if painting. These details make your project unique and special.
Take your time with these steps. They make all the difference. Show off your work with pride!
Planting Tips to Ensure Your New Planter Box Thrives
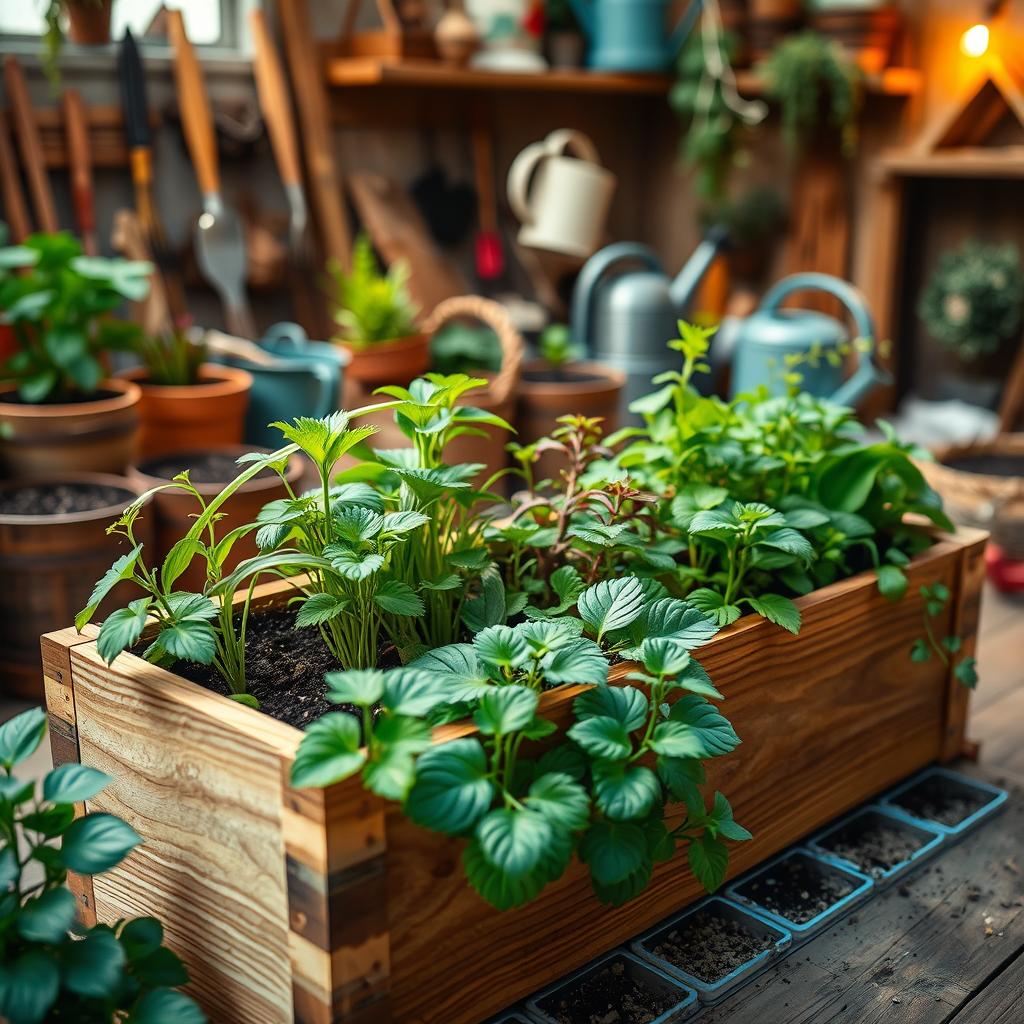
After building your wooden planter, the right planting techniques are key. Start by adding landscape fabric at the bottom. This helps with drainage and keeps the soil in place. Use a mix of 2/3 potting mix and 1/3 compost for the best aeration and nutrition.
- Plant Placement: Group plants by their water needs. For example, basil does well near flowers that love moisture, like petunias.
- Depth Matters: Plant up to the first set of leaves to help roots grow strong.
- Spacing Rules: Keep 2–4 inches between plants, depending on their size. A crowded planter can lead to disease.
| Plant Type | Planting Depth | Spacing |
|---|---|---|
| Tomatoes | 12–18” deep | 18–24” apart |
| Salad Greens | 1–2” deep | 3–4” apart |
| Flowering Annuals | Seed packet depth | Follow plant tag spacing |
Water deeply but let the soil dry a bit between waterings. In winter, move tender plants inside or wrap the planter with burlap. Regularly add slow-release fertilizer to keep your diy home improvement planter thriving all year.
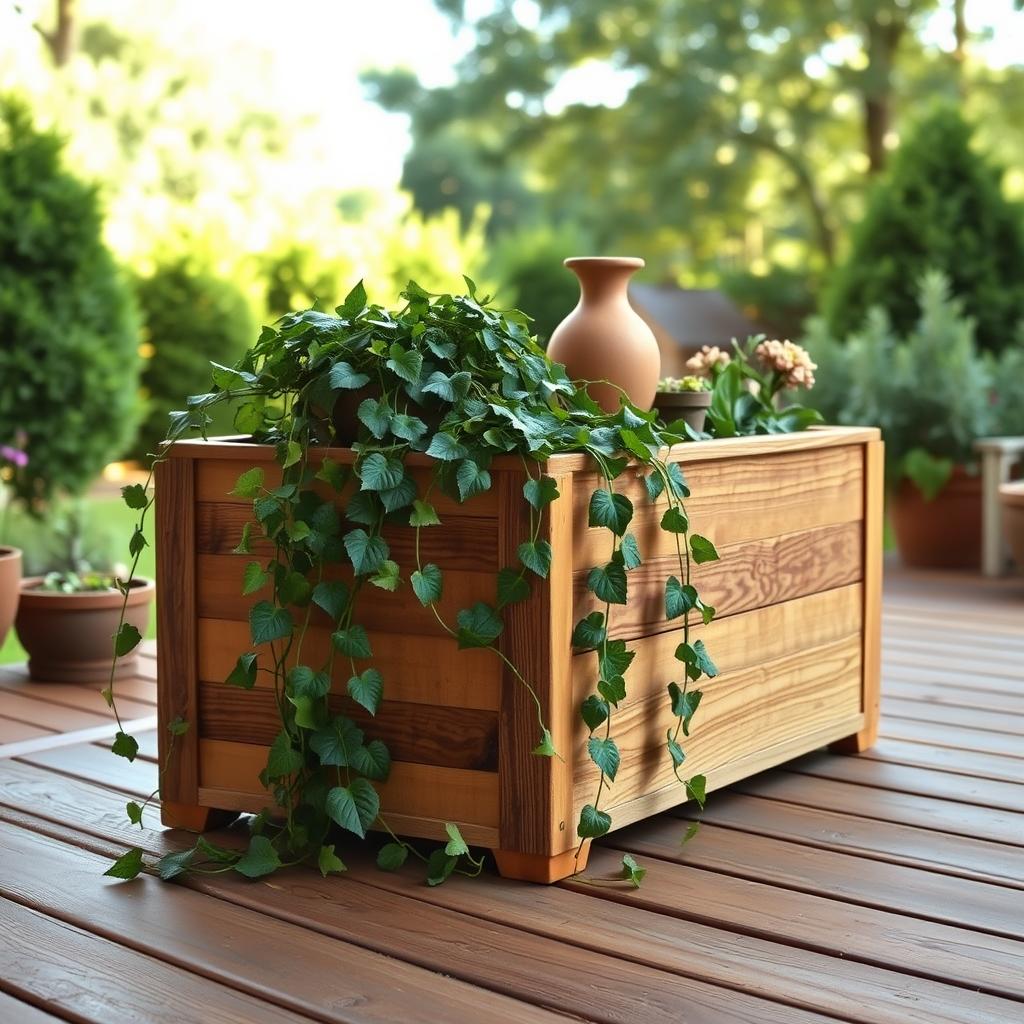
Creative Variations to Customize Your Wooden Planter
Ready to level up your woodworking projects for beginners? These designs let you make your planter your own. Just a few changes can change your garden or home.
Elevated planters make gardening easier. Use 2x4s to build legs or a stand. Then, attach them to the base with screws. Here are some ideas:
- Raise planters 18–24 inches for easier gardening
- Add wheels for mobility
- Use lattice bottoms for drainage airflow
Multi-tiered planters add vertical interest. Stack boxes with L-brackets or attach tiers to a post. Each level can have different plants, like herbs below and flowers above. Just align corners and secure with pocket holes.
Bring plants inside with cedar or pine. Line boxes with waterproof fabric or EPDM rubber liners. Paint or stain to match your home—great for kitchen windowsills or sunrooms.
For small spaces, try vertical pockets or corner brackets. Rail-mounted planters save space, and narrow designs fit tight spots. Even a 6-inch-deep box works for plants like lettuce or succulents.
These woodworking projects for beginners show you can customize without complexity. Whether for mobility, style, or space, every idea builds on basics you know. Mix and match to make a planter that’s all yours.
Troubleshooting Common Issues in DIY Planter Box Construction
Building your own wooden planter is a rewarding beginner-friendly home renovation project. But even the simplest builds can hit snags. Don’t let setbacks stop you—most issues have quick fixes. Here’s how to tackle common problems and keep your project on track.
“Mistakes are part of the process. Every pro started as a beginner.”

Warped wood causing alignment issues? Clamp joints tightly during assembly. Swap warped planks for straighter pieces or use moisture-resistant cedar. Kiln-dried lumber resists warping better than cheaper options.
Structural weaknesses? Reinforce corners with metal L-braces or corner brackets. For existing boxes, drill and attach supports inside the planter for hidden strength. Double-check joints with a level before final assembly.
Stains or sealant gone wrong? Uneven stains? Sand the surface lightly and recoat. Peeling sealant? Clean the area, let it dry, and apply a new coat. Use a foam brush for even application and avoid drips.
Splits or gaps during assembly? Drill pilot holes before driving screws to prevent wood splitting. Tighten loose gaps with wood glue and clamps. For uneven corners, measure twice and cut again—precision matters here.
Long-term rot or leakage? Line the bottom with landscape fabric to block soil. Rot spots? Sand, treat with wood preservative, and reseal. Sagging bases can be braced with a central support board.
Every hiccup is a chance to learn. Most fixes take minutes and basic tools. Embrace the trial-and-error spirit of beginner-friendly home renovation. Your planter will thrive with these adjustments. Stick with it, and you’ll end up with a sturdy, beautiful garden piece.
Conclusion: Enjoying Your Handcrafted Wooden Planter Box
Your wooden planter box is more than a garden tool. It shows you can do easy woodworking projects that are both useful and creative. As plants grow in it, you’ll see how it adds value to your home.
Whether it’s flowers or herbs, your planter stands out. It shows off your personal style. Take photos of your planter to inspire others. Share them on social media or gardening groups.
Seeing your planter grow over time is very rewarding. It shows the beauty of DIY and nature together. Each flower or plant reminds you of your pride in creating something beautiful and useful.
Now you can try other outdoor projects like a garden trellis or a simple bench. The skills you learned are a great base for more projects. Even small changes, like painting or trying new shapes, keep things exciting. Remember, each project helps you grow and feel satisfied.
FAQ
What are some beginner-friendly woodworking projects I can try?
There are many easy woodworking projects for beginners. You can start with a custom wooden planter box, simple shelves, a birdhouse, or a wooden bench. These projects can make your home look better and help you feel proud of your skills.
How can I select the right wood for my DIY home improvement project?
When picking wood, look for weather-resistant options like cedar or redwood. They are strong and look great. For a cheaper choice, try pressure-treated pine. Also, choose wood that’s good for the planet, like responsibly sourced materials.
What are some beginner woodworking tips I should keep in mind?
Take your time when measuring and cutting to get it right. Start with simple projects and then try harder ones. If you need help, ask or look online. Always wear safety gear, like gloves and goggles, when working with wood or power tools.
How can woodworking enhance my home décor?
Woodworking lets you make unique pieces that match your style. You can make a planter box, decorative shelves, or a cozy bench. These projects let you show your creativity and make your home look better.
What materials do I need for easy woodworking projects?
You’ll need wood, screws or nails, wood glue, and finishing products like sealants or stains. Depending on your project, you might also need landscape fabric or decorative items to make it special.
Can I adapt woodworking projects for indoor use?
Yes, you can! Many outdoor projects can be used indoors. Just make sure to use the right wood treatments to protect against moisture. Also, think about how your design will fit with your indoor style.
What should I do if I encounter issues while building my planter box?
Don’t worry, it’s normal to run into problems! For warped wood, use clamps to straighten it. For weak spots, you can add reinforcement after it’s built. Most problems have simple fixes, so stay calm and keep learning!