Woodworking projects are full of creative possibilities. They range from simple to complex and are great for DIY fans and beginners. With the right tools and techniques, you can make unique and useful items for your home or as gifts.
Woodworking is a fun hobby that lets you build furniture, decorations, or useful items. You can start with easy projects like birdhouses and picture frames. Then, move on to more challenging projects like cabinets and tables. It’s a great way to begin, and with practice, you can make beautiful pieces.
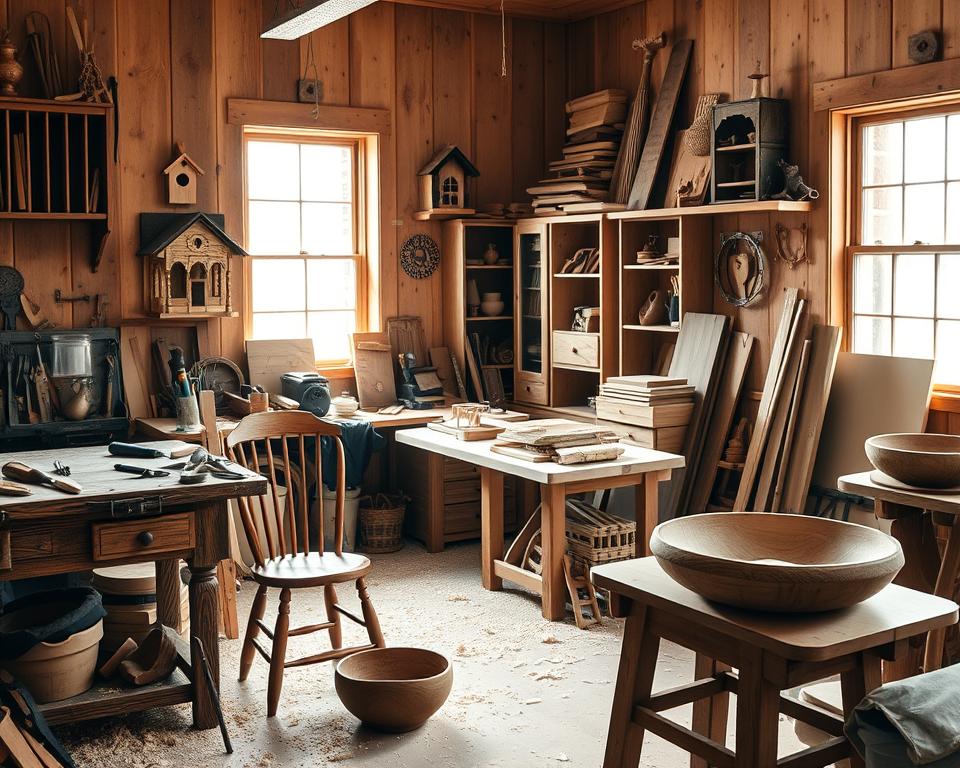
Woodworking needs safety and proper technique for success. By following safety rules and using the right tools and materials, you can make professional-looking items. It might seem scary for beginners, but with the right help, you can start and enjoy DIY woodworking.
Introduction to Woodworking
Before starting any woodworking project, knowing the basics is key. This includes safety, tool use, and choosing materials. With this knowledge, you can take on many projects and make items that show your style.
Key Takeaways
- Woodworking projects offer a wide range of creative possibilities
- DIY woodworking and woodworking for beginners can be a fun and rewarding hobby
- Safety and proper technique are essential for successful outcomes
- Woodworking projects require attention to detail and patience
- With practice and experience, anyone can create professional-looking pieces
- Woodworking for beginners can be intimidating, but with the right resources, anyone can get started
Essential Tools and Safety Guidelines for Woodworking Success
Woodworking needs the right tools and safety rules for success. Tools range from simple hand tools to complex power tools. Knowing how to use them is key for top-notch results. Safety is also crucial to avoid injuries and keep the workspace safe.
A good workshop setup is important for safe and efficient woodworking. It should have good lighting, air, and storage for tools. A well-set workshop boosts productivity and cuts down accident risks.
Must-Have Tools for Beginners
- Table saw or circular saw for making straight cuts
- Drill press for precise drilling
- Sanders for smoothing out wood surfaces
Basic Safety Equipment
Always wear safety glasses and a dust mask when using power tools. They protect against flying debris and dust, which can be dangerous.

Workshop Setup Tips
A tidy workshop makes woodworking better. It should have organized tool storage, a clean area, and good lighting and air.
| Tool | Description | Importance |
|---|---|---|
| Table saw | Used for making straight cuts | High |
| Drill press | Used for precise drilling | Medium |
| Sanders | Used for smoothing out wood surfaces | Low |
Building a Simple Floating Shelf
Starting with a simple floating shelf is a great woodworking project for beginners. It requires just a few tools and materials. You’ll need a drill, saw, and sandpaper to begin.
A floating shelf adds a nice touch to any room. You can choose from various woods like oak or pine for a unique look. Adding decorative trim or molding can also enhance its appearance.
Here are some tips for building your floating shelf:
- Choose high-quality materials for a sturdy shelf
- Measure carefully to ensure it’s level and secure
- Consider adding a finish like stain or polyurethane for protection and beauty
For example, a floating shelf in a living room can display vases or picture frames. In a bedroom, it’s perfect for books, jewelry, or personal items. With creativity, you can make a beautiful and useful shelf.
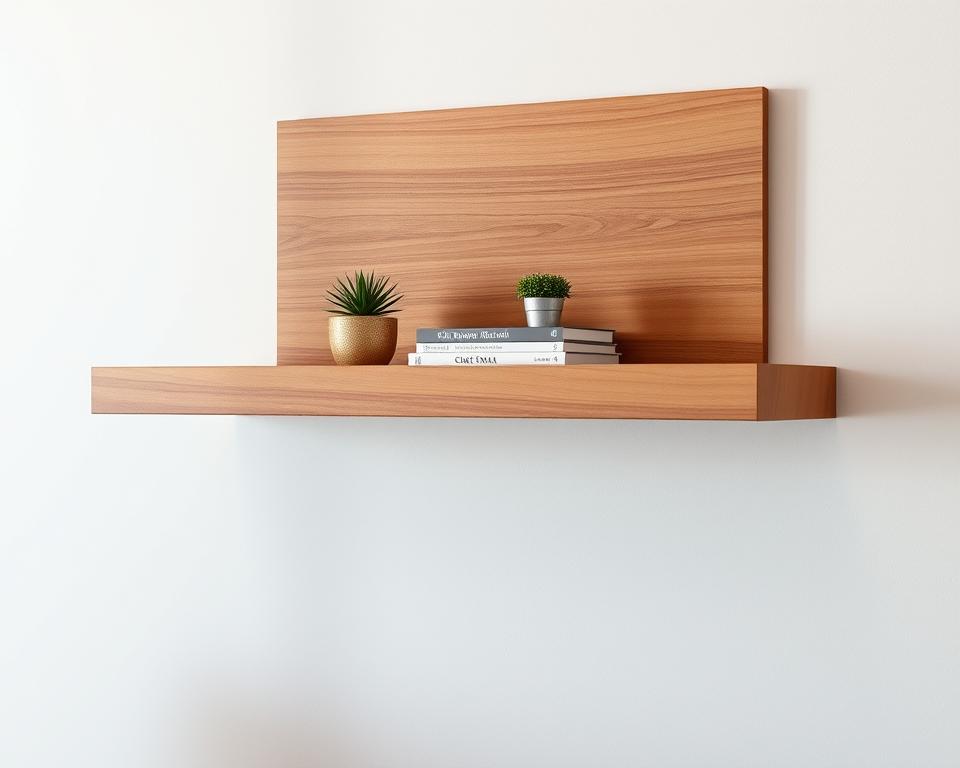
Building a floating shelf is a great way to improve your woodworking skills. With patience and practice, you can create a lasting piece of furniture. Whether you’re new to woodworking or experienced, a floating shelf is a rewarding DIY project.
| Material | Quantity | Cost |
|---|---|---|
| Wood | 1 board | $10 |
| Screws | 10 | $5 |
| Drill | 1 | $20 |
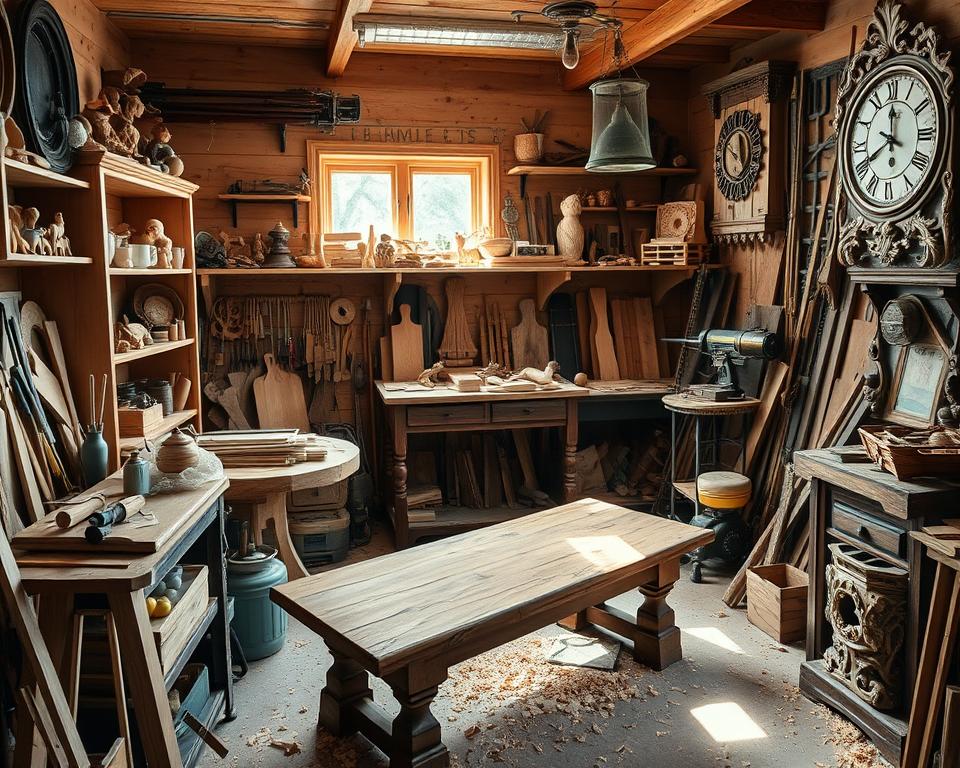
Creating a Rustic Coffee Table from Reclaimed Wood
Reclaimed wood is a favorite for woodworking projects. Making a rustic coffee table is a great way to show off its beauty. It’s important to pick and prepare the wood well to make a strong and good-looking piece of furniture.
A rustic coffee table from reclaimed wood brings warmth and character to any living room. First, check the wood for any damage like cracks or rot. Then, clean and dry it well. This step is important to make sure the wood is stable and ready to use.
Selecting the Right Wood
When choosing reclaimed wood for your coffee table, look for wood with a rich history and unique character. Think about the wood’s color, texture, and grain. Also, consider its durability and stability. Oak, pine, and maple are popular choices.

Assembly and Finishing Techniques
After picking and preparing your wood, start building your coffee table. You can use different techniques like mortise and tenon joints or dovetail joints. These make the table sturdy and durable. For finishing, use a natural stain or sealant to highlight the wood’s beauty and protect it.
With patience and care, you can make a beautiful and useful rustic coffee table from reclaimed wood. It will be the highlight of your living room. Whether you’re experienced or new to woodworking, this project is a great way to show your skills and make something unique that reflects your style.
Cool Wood Working Projects for Weekend Crafters
For weekend crafters, woodworking is a fun hobby. You can make unique and useful items for your home. Projects like birdhouses, picture frames, and coasters are great for beginners.
Starting with simple DIY woodworking projects is key. They help you gain confidence and skills. Here are some tips for quick woodworking projects:
- Choose a project that requires minimal tools and materials
- Plan your project carefully, including measuring and cutting your wood
- Use pre-made templates or kits to simplify the process
Some popular woodworking projects for weekend crafters include:
| Project | Difficulty Level | Time Required |
|---|---|---|
| Birdhouse | Easy | 2-3 hours |
| Picture Frame | Easy | 1-2 hours |
| Coasters | Easy | 30 minutes |
These projects are perfect for weekend crafters. With practice and patience, you can make beautiful items for your home.
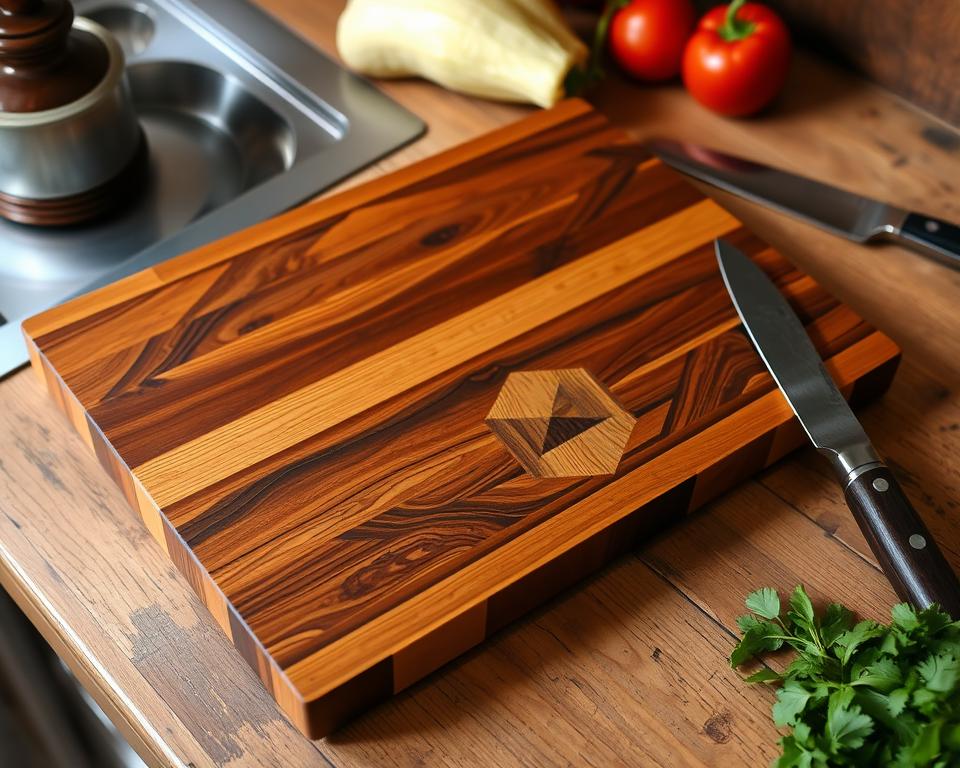
Crafting a Custom Cutting Board
Making a custom cutting board is a fun woodworking project. It’s a chance to hone your skills and add something useful to your kitchen. A well-made cutting board can be both beautiful and practical, thanks to the right materials and techniques.
Choosing the right wood is key for a safe cutting board. Hardwoods like maple, walnut, and cherry are good because they’re dense. This makes them less likely to get scratched or cracked, which can be a breeding ground for bacteria. Also, avoid woods with chemicals that could harm your food.
Wood Selection and Pattern Design Options
Here are some top wood picks for cutting boards:
- Maple: a light-colored, dense wood that is resistant to scratches and stains
- Walnut: a dark-colored, dense wood that is rich in texture and color
- Cherry: a reddish-brown wood that is known for its fine grain and durability
You can also play with design. Mix different woods for a cool look or add a personal message. This makes your cutting board truly unique.
Finishing and Maintenance
To keep your cutting board in top shape, use a food-safe finish. Natural oils or waxes are good for protecting the wood. Stay away from harsh chemicals or cleaners that can harm the finish.
By following these tips, you can make a cutting board that’s both beautiful and useful. It’s a great project for any woodworker, whether you’re a pro or just starting out. It’s a way to practice your skills and create something special.
| Wood Type | Characteristics | Food Safety |
|---|---|---|
| Maple | Dense, light-colored | Safe |
| Walnut | Dense, dark-colored | Safe |
| Cherry | Reddish-brown, fine grain | Safe |
Building an Outdoor Garden Planter Box
Creating an outdoor planter box is a fun woodworking project. It can add elegance to your garden. With basic tools and skills, you can make a beautiful planter box for your plants.
To start, gather wood, screws, and a drill. You can choose from woods like cedar or pine. These woods match different garden styles. Here’s how to build your planter box:
- Choose wood that’s durable and won’t rot.
- Measure and cut the wood to the right size with a saw and drill.
- Assemble the box with screws and a drill.
After building, you can make your planter box unique. Add a finish like stain or paint. Decorate it with plants and accessories. An outdoor planter box is a great garden addition. You can make your own with these simple steps.

By following these steps and being creative, you can make a beautiful planter box. It will improve your garden decor and be a rewarding project.
| Material | Quantity | Cost |
|---|---|---|
| Wood | 10 boards | $50 |
| Screws | 20 screws | $10 |
| Drill | 1 drill | $20 |
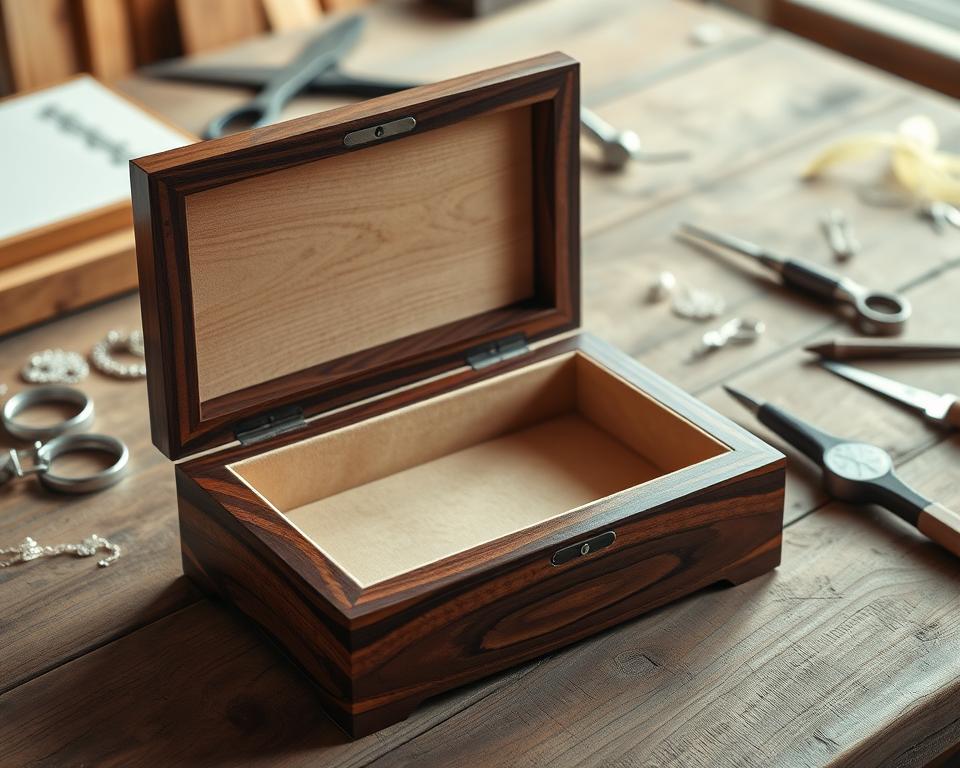
Advanced Joinery: Creating a Dovetailed Jewelry Box
Advanced joinery is key for making intricate woodworking projects like a dovetailed jewelry box. This project needs patience, detail focus, and knowledge of advanced joinery. We’ll look at making a dovetailed jewelry box, from picking wood to putting it all together.
Choosing the right wood is the first step for a dovetailed jewelry box. Cherry or walnut works well. Then, prepare the wood pieces carefully for a perfect fit. Dovetail joints make the box strong and durable, lasting many years.
Understanding Dovetail Joints
Dovetail joints are common in woodworking, especially for boxes and drawers. They’re made of interlocking tails and pins, making a strong joint. To make one, you need special tools like a dovetail saw and chisel, and a precise technique.
Wood Selection and Preparation
Picking the right wood is crucial for a dovetailed jewelry box. Choose wood like cherry or walnut. Cut and sand the wood to the right size, removing any flaws.
Final Assembly and Hardware Installation
Putting the box together involves adding hardware like hinges and a latch. You also apply a finish, like stain or varnish. Installing hardware correctly ensures the box opens smoothly and the latch works right.
Here’s a quick guide to making a dovetailed jewelry box:
| Step | Description |
|---|---|
| 1 | Selection of wood |
| 2 | Preparation of pieces |
| 3 | Creation of dovetail joints |
| 4 | Final assembly |
| 5 | Installation of hardware |
Constructing a Modern Bedside Table
Building a furniture making project like a modern bedside table is a great start. It needs just a few materials and basic tools. You’ll need wood, screws, and a drill to begin. Check out woodworking guides for a full list of tools and materials.
A modern bedside table fits many decor styles. You can add a glass top for a sleek look or use reclaimed wood for a rustic feel. Beginners often start with simple projects like a floating shelf or a custom cutting board.
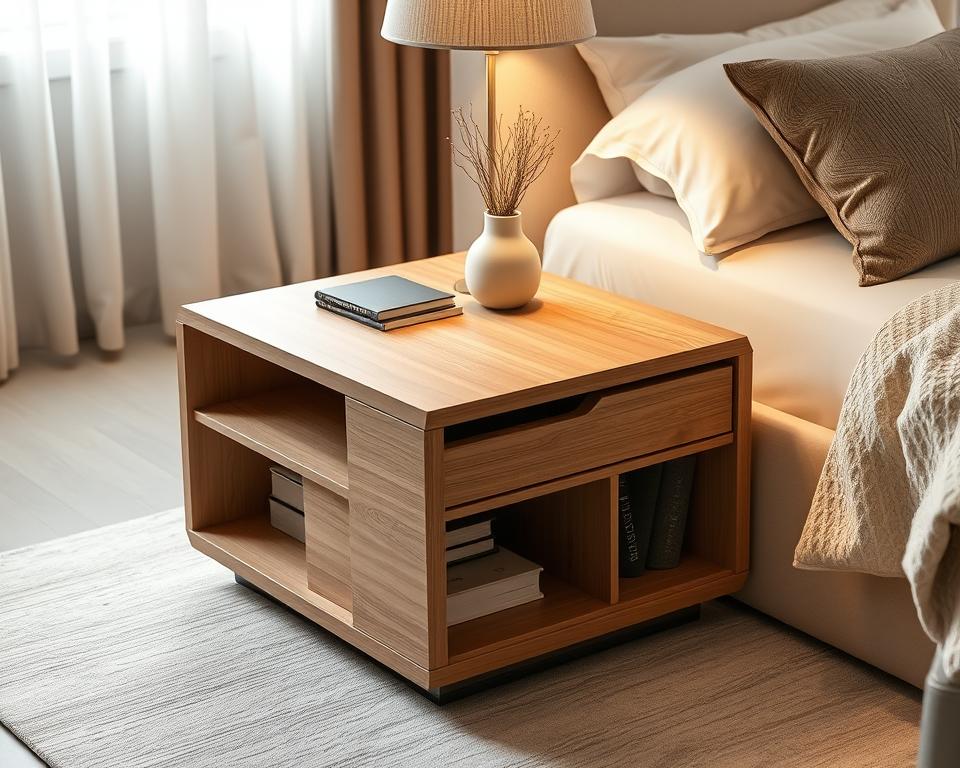
- Choose durable, scratch-resistant wood.
- Think about adding a drawer or shelf for more storage.
- Pick a finish that matches your bedroom’s style, like lacquer or stain.
By following these tips and being creative, you can make a beautiful bedside table. It will improve your bedroom’s look and feel. Whether you’re new to woodworking or experienced, this project is a great way to hone your skills. With patience and practice, you can create stunning furniture like a modern bedside table.
| Project | Difficulty Level | Time Required |
|---|---|---|
| Modern Bedside Table | Intermediate | 2-3 days |
| Simple Floating Shelf | Beginner | 1 day |
| Custom Cutting Board | Beginner | 1 day |
Building a Home Office Desk with Storage
A well-designed desk is key for a functional home office. A desk with storage keeps your space organized and clutter-free. Start by measuring the area where your desk will go. This will help you choose the right size and shape.
Adding storage to your desk design is smart. Think about drawers, shelves, or cabinets for office supplies and papers. This keeps your desk tidy and helps you focus. When woodworking, planning and choosing materials are crucial.
Planning and Measurements
Before building your desk, plan and measure your space well. Think about the work you’ll do and the equipment you’ll need. List the features you want, like storage, cable management, and ergonomic design.
Cable Management Solutions
Cable management is vital for a clean desk. Use cable ties, organizers, or systems to manage cords. This reduces clutter and helps you focus.
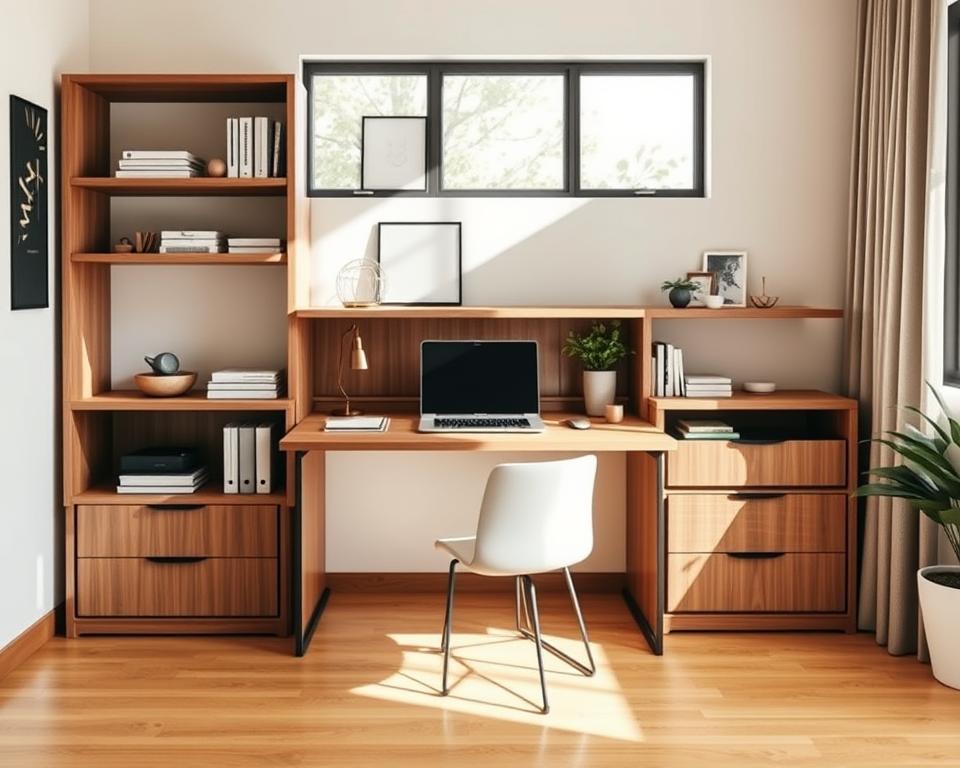
Drawer Construction Tips
Building drawers for your desk can be tough, but with the right tools and materials, it’s doable. Use quality wood and hardware, and measure and cut carefully. With practice, you’ll make drawers that look and work great.
Adding storage, cable management, and ergonomic features to your desk makes a great workspace. Whether you’re experienced or new to woodworking, building a desk with storage is rewarding and challenging.
| Feature | Description |
|---|---|
| Storage Solutions | Drawers, shelves, cabinets |
| Cable Management | Cable ties, cable organizers, cable management systems |
| Ergonomic Design | Adjustable height, comfortable seating, adequate lighting |
Conclusion: Taking Your Woodworking Skills to the Next Level
The world of woodworking skills is full of endless possibilities. You can start with simple projects like floating shelves and outdoor planters. Or, you can dive into more complex techniques like dovetail joinery.
To improve your woodworking skills, keep practicing and trying new advanced woodworking projects. Look for woodworking workshops and join local maker communities. Stay up-to-date with new tools and techniques. Always remember to keep safety first and enjoy the learning journey.
Woodworking lets you create custom furniture, intricate wood carvings, or just enjoy making something yourself. The world of woodworking is waiting for you. Start your journey, let your creativity flow, and watch your skills grow in advanced woodworking.
FAQ
What are the essential tools and safety equipment needed for woodworking?
Beginners need hand tools like chisels, hammers, and saws. Power tools like a circular saw, jigsaw, and drill are also key. Safety gear includes glasses, a dust mask, and ear protection.
Setting up a workshop is important. It should have good lighting, air, and storage for tools.
How do I build a simple floating shelf?
To make a floating shelf, you need wood, glue, screws, and wall anchors. Measure and cut the wood to size. Attach it to the wall with screws and anchors, making sure it’s straight.
Use glue on the joints, clamp, and let it dry. Add finishing touches like stain or paint.
What considerations should I keep in mind when creating a rustic coffee table from reclaimed wood?
Choose wood without defects and clean and dry it well. Use mortise and tenon joints for strength. Try different finishes like stain and seal to get a rustic look.
What are some cool woodworking projects that can be completed over a weekend?
Weekend projects include birdhouses, picture frames, coasters, and simple shelves or planters. They need little tools and materials, so you can finish them quickly.
How do I craft a custom cutting board that is safe for food preparation?
Use food-safe hardwoods like maple or oak for the cutting board. Add unique wood patterns and designs. Finish and maintain it with oil and seal to keep it safe and durable.
What steps are involved in building an outdoor garden planter box?
You’ll need wood, screws, and maybe a waterproof lining for the planter box. Measure, cut, and assemble the box with screws. Add decorations or customize it to match your garden. Use weather-resistant finishes and ensure good drainage.
How do I create a dovetailed jewelry box using advanced joinery techniques?
Making a dovetailed jewelry box means learning about dovetail joints and choosing the right wood. Start by mastering dovetail cutting, then prepare your wood. Assemble the box carefully, ensuring precise joints. Add hinges and a latch for the finishing touches.
What are the key considerations when constructing a modern bedside table?
Focus on materials and design for a modern look. Plan the size to fit your space. Add storage or unique legs for customization. Ensure the proportions and balance for a beautiful and functional piece.
How do I build a home office desk with storage solutions?
Start by planning and measuring to fit your space. Add cable management like organizers and grommets. Use sturdy drawer slides for smooth operation. Pay attention to detail for a reliable desk.